Excel Office Script Basics
Content
- Introduction
- Video
- Enabling the Automate tab
- Using the Automate tab
- Starting a Script
- Further reading
Introduction
Since July 2020, Microsoft 365 users can record their actions in Excel on-line into Office Script macros. This article shows you how to get started. I've also listed some example scripts which you cannot record but might come in handy.
Video

Here's a link
to the video on Youtube.
Enabling the Automate tab
First of all, whether or not you can use Office scripts is controlled by your Microsoft 365 administrator. If you are a one-man shop, you can turn this on yourself. If not, you can at least show your admin what setting you want turned on and where that switch is.
- Go to https://office.com and click
the admin button:

- In the admin center, click the search box and enter "Office Script"
(without the quotes) and choose the "Office Scripts" entry as shown
below:
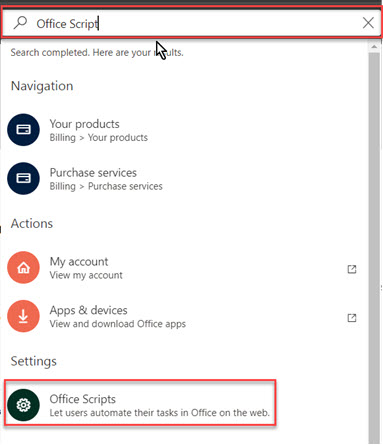
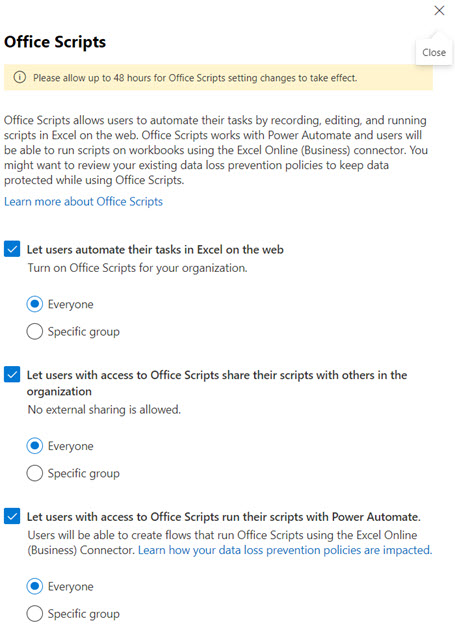
- A side-pane opens containing the options to pick. Notice how the
admin can grant access to Office scripts to everyone but also limit
access to just specific groups. I have it set like this:
Odd enough, when I was retracing the steps above (just minutes after creating those screen-shots!), I could not get it to show the same search result. So, if the Search does not return the button I showed earlier, here are the individual steps:
- Open the Admin center and click on "Show All":
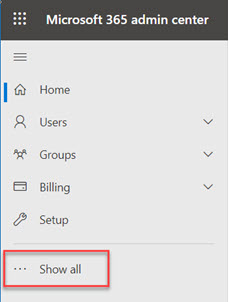
- Next, click on Settings, then click Org settings and then in the
right-hand pane scroll down until you find the Office Scripts entry.
Click on that:

- You'll get the same pane as shown in step 3 above.
Using the Automate tab
Once the admin changes have trickled through to your user account (this may take more time than you expect, perhaps as much as two days!), you should see an Automate tab appear as soon as you open an Excel file in your browser:

Lets have a look at the options we have here.
Record Actions button
What, Really? An on-line macro recorder? Yes, an on-line macro recorder!
What does it record, you might ask? The Record actions button records your Workbook editing steps into a special version of Office JavaScript (Office-JS). Fortunately, Microsoft has taken the trouble of "hiding" the most complicated part around programming JavaScript from the user.
Because JavaScript runs in the browser and has to communicate with a server (Excel on-line), most commands are processed asynchronously. Office JS code does not work the same as VBA code does, where each line triggers an action immediately. This means that "executing" a JavaScript line is more like sending a request to the server running Excel. It is up to the server to perform that request in its own time. You cannot depend on the request having been executed before your next line of code is executed. This principle is explained well in this documentation.
But as I said: That complexity is hidden from us and Office Script works more or less the same for us mere mortals as VBA code does.
As soon as you click the record Actions button, the recorder is running. There is no Macro name or location to be entered like when recording VBA:
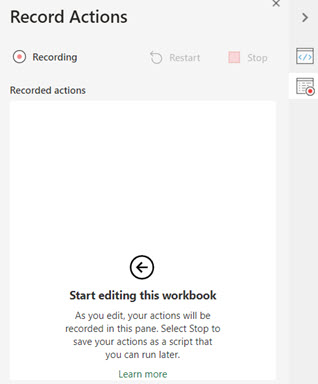
Notice there's a "Learn more" link at the bottom. It takes you to the official Microsoft tutorial about recording scripts.
I took three actions: I inserted a new worksheet, typed my name into cell A1 and entered today's date into A2. The pane now looks like this:
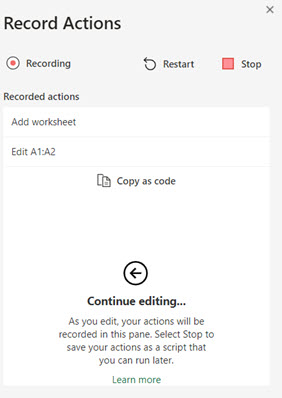
The recorder has added the steps and a new "Copy as code" link has appeared. If you click that, the currently recorded code is placed on the clipboard. In addition there is a "Restart" button and a Stop button. Restart just deletes all recorded actions from the macro. Stop -well- stops the recorder.
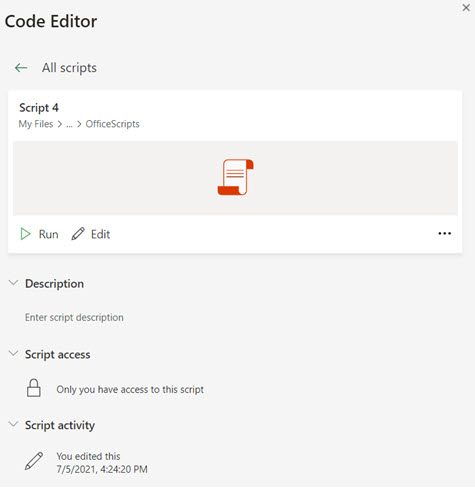
After you've clicked the Stop recording button, the script is saved using a default name, which you can change later:
Of course Microsoft hid some important features behind the infamous ellipses button:
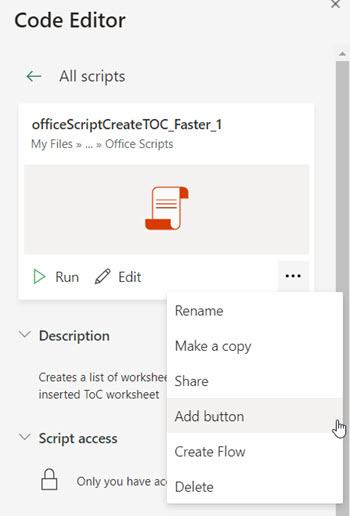
So this is where you find the option to rename your script to something more meaningful like AddSheetAndEnterMyName. More importantly, this is also where the option to share your script with your co-workers is, either by using the Share feature, or by using the Add button item (see below). And, very very useful: An Office script can be part of a Flow, which you can create from that menu too.
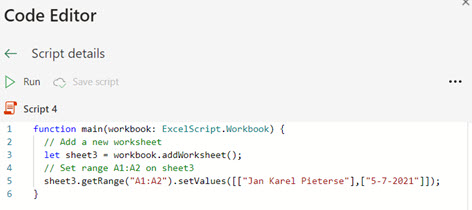
Now what does that recorded code look like and how do I access it? Simple, click that "Edit" button up there (next to "Run")! This is what my recorded actions translate into in Office Script:
Work in progress
You'll soon notice this Office script business is a work-in-progress, there are actions which the recorder cannot turn into script yet. If that happens, the recorder pane will show "This action is not yet recordable":
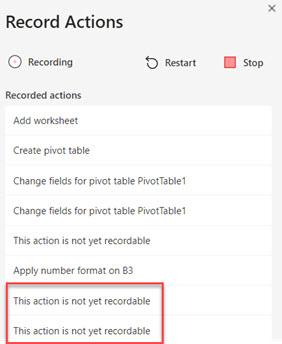
These unrecordable actions show up in the script as commented lines:
// Unknown event received with eventId:578
// Unknown event received with eventId:578
Rest assured Microsoft is working hard to add new actions to the recorder. I'm impressed how many actions have been added since I first started trying the script recorder.
New Script button
If you're brave enough, this is the way to start writing Office Scripts from scratch; you just click the New Script button and off you go!
Recent Scripts gallery
Microsoft keeps a list of recently used or recorded scripts in the Recent Scripts gallery for easy access:
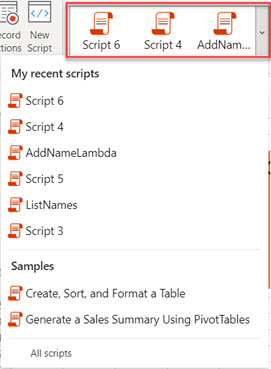
Needless to say you can access all your scripts using the All scripts button at the bottom of that fly-out. More importantly, for the beginners there's a couple of samples available too.
See? Simple! Nothing to it. I suggest you to start experimenting. Try various different things with that script recorder turned on.
Here are some example scripts I was unable to record. But wrote anyway.
Starting a Script
There are currently three ways to start a script:
- By clicking Run in the Script Code Editor pane
- By adding a Run script trigger in a Power Automate Flow
- By adding a button (as decribed below)
After clicking the "Add Button" menu item in the screen-shot below, Excel will insert a button with the name of the script as its caption:

The button is inserted at the cell which happened to be active when you clicked the Add button menu item, so it is a good idea to first select the cell where you want the button to appear.

After clicking the button, the Script Editor pane opens to show progress:
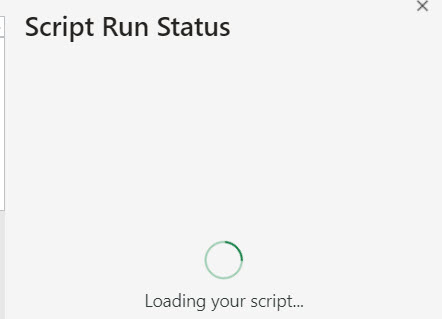
Once the script is done, the pane shows its result:
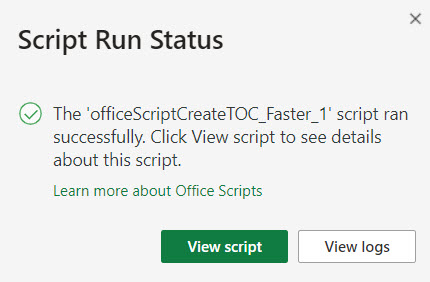
A script button now also works on desktop Excel, provided you are subscribed to the Office Insider program.
Further reading
Here's an an article with some example scriptsHere are some links to the Microsoft documentation on Office Scripts:

Comments