 Back to jkp-ads.com |
Ron de Bruin
|
|
 Back to jkp-ads.com |
Ron de Bruin
|
|
Ron de Bruin decided to remove all Windows Excel content from his website for personal reasons. If you want to know why, head over to rondebruin.nl.
Luckily, Ron was kind enough to allow me to publish all of his Excel content here.
Most of these pages are slightly outdated and may contain links that don 't work. Please inform me if you find such an error and I'll try to fix it.
Kind regards
Jan Karel Pieterse
For example your data in Excel looks like this:
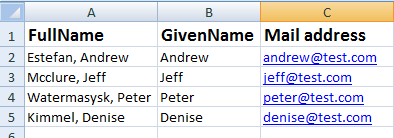
You can add more columns with information but I use three columns in my example.
Outlook 2003-2013
In the example below I show you how to import contacts that are in a Excel file, this option is only working in Outlook 2003-2010 and not in Outlook 2013. If you use data in a Excel file the file must be in the Excel 97-2003 format (xls and not xlsx or xlsm) and your data range must have a name.
Outlook can only import data from an Excel file(xls) from a named range so we select A1:C5 in this example (with the header row) and use the shortcut Ctrl F3 to open the Name dialog to give the range a name. I use the name "ContactsData". Then we save this file and close it.
Outlook 2003-2013
Another way is to save your Excel file as CSV (comma delimited). There is no need to give the range a name if you do that and it is working in Outlook 2003-2013. In Outlook 2013 you can't import from a Excel file so save as CSV is the only option there.
Open Outlook and go to File>Import and Export , in Outlook 2013 it is File> Open & Export .... Import/Export (Screenshots are from Outlook 2007 but almost the same in other Outlook versions
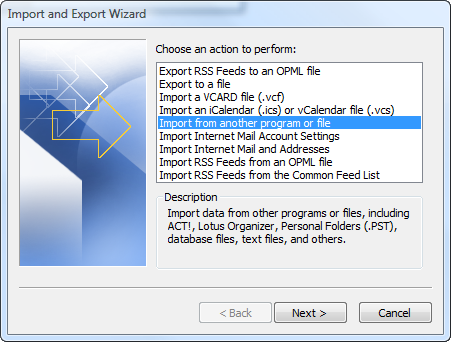
Select "Import from another program or file" and press "Next >"
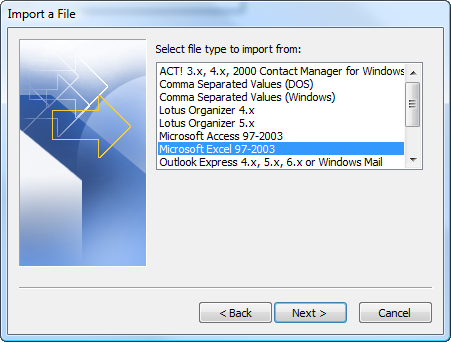
Select "Microsoft Excel 97-2003" or "Microsoft
Excel" and press "Next >"
Note
: Select "Comma Separated Values (Windows)" if you save
your Excel file as CSV
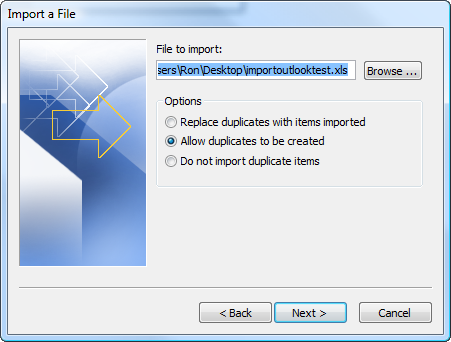
Browse to the file and press "Next >"
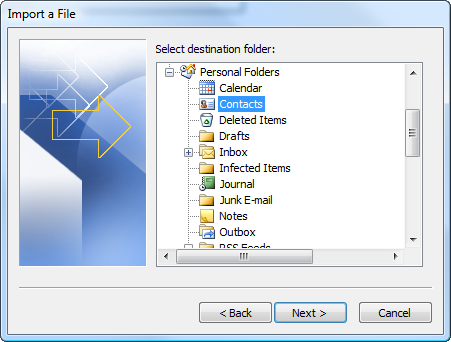
Select "Contacts" and press "Next >"
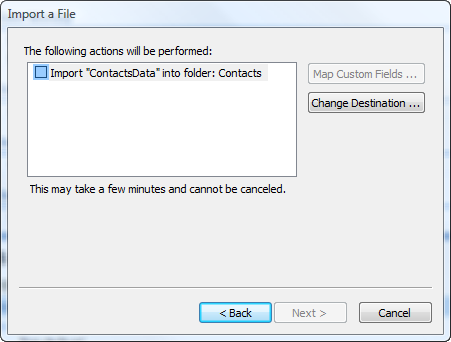
You see your named range or csv file name in this dialog. If there are
more named ranges in the file you see them also in this dialog.When you mark
the checkbox before your named
range or csv file name the dialog below
popup and you can map your fields.
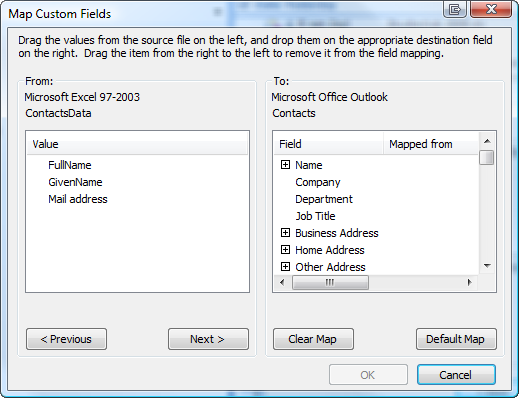
After you are ready press OK in the "Map Custom
Fields" dialog
and press Finish in the "Import
file" dialog.