Creating modern-looking userforms in VBA
Content
Introduction
The Microsoft VBA editor was designed somewhere around 1996. This means that the standard design of the userforms you create with that editor look really old-school if you don't do anything. Here I show how we might create a more modern-looking user-interface by changing some properties of the form and by using some tricks.
The example file
Download the file which contains both an old-school userform and two modern forms.
Default userform properties
When you insert a new userform into your VBA project, the form is set to default properties:
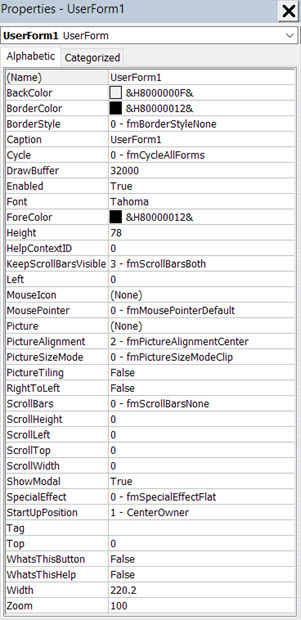
The default settings of a userform are used as a template for any new control you add to it, so you can save yourself a lot of time by making the right choices right away.
Here are the settings I use to make my forms look more modern, next to the defaults. I've marked the ones I changed:
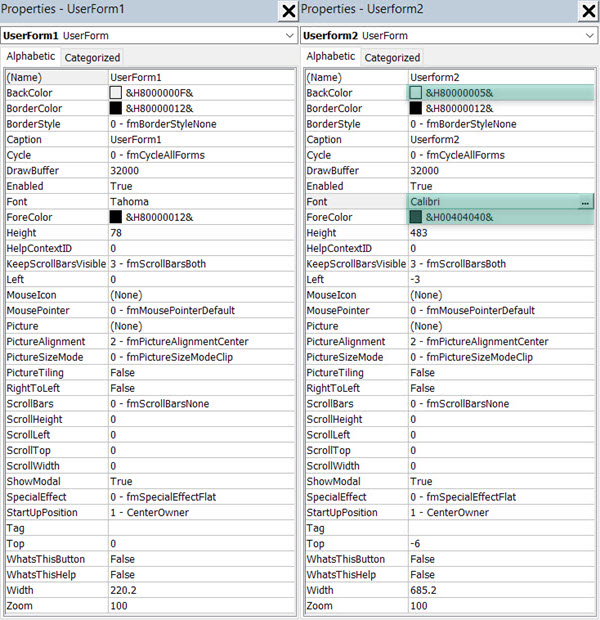
The properties I change are:
- Backcolor
I set that to Window Background (which is usually white) rather than the stale grey we normally get
- Font
I change that to Calibri, just because I like that better than the default Tahoma. Calibri turns out slightly smaller than Tahoma, which is why I set the size to 9 rather than 8.
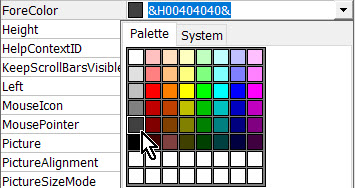
- ForeColor
I set that to the darkest grey there is on the palette (just because I find Black is too black):
Modern looking controls
Checkbox alternative
This is the standard look of a userform with a checkbox:

Boring!
Let's see if we can improve on that:

See? That is better. So how did I create this?
- From the Insert tab of Excel, choose Insert Icon:
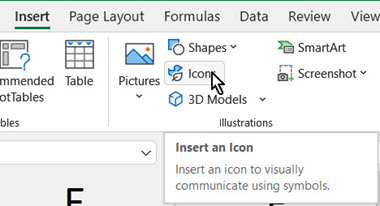
- In the subsequent window, type "switch" in the search box, this
is what I got:
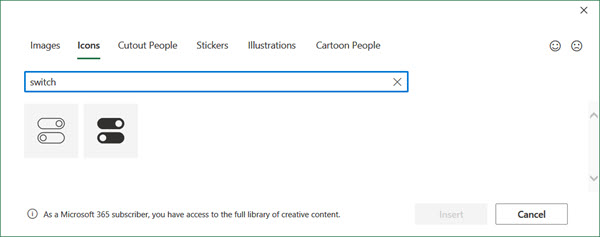
- I selected both icons and clicked Insert, giving me this:

- I don't like the black. Let's change that. Right-click either of
the icons and choose "Convert to shape"
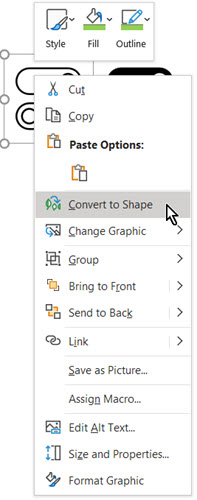
- This ensures the icon is converted to a grouped set of built-in
shapes, which are easy to adjust. I did not change the selection, instead,
I clicked the Shape Format contextual tab:
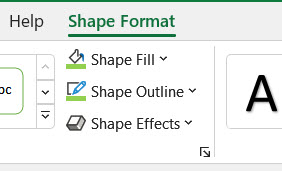
- I changed both Shape Fill and Shape Outline to green
- I repeated steps 4 to 6 for the black (filled) switch
- I dragged a checkbox control on my form (used a slightly larger
Font size of 14)
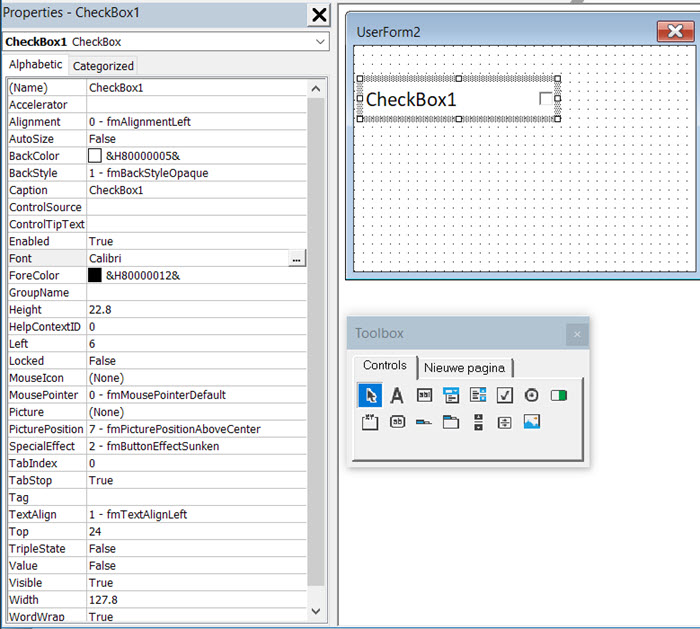
- Next I added an Image control, set its border to be hidden and the
backcolor and BorderColor to Window background, BorderStyle to 0 - BorderStyleNone:
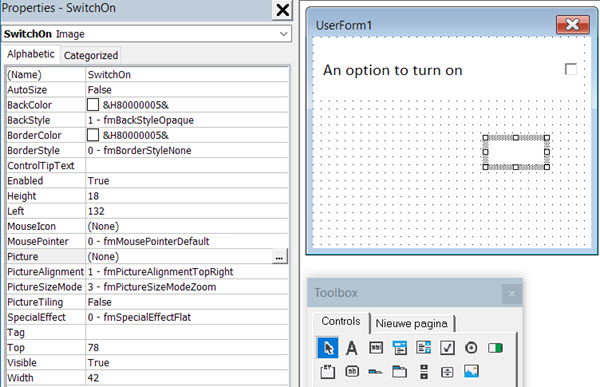
- I copied this control (we need two image controls)
- One by one I then copied the switches, by right-clicking them on
the worksheet and choosing Copy, clicked inside the Picture property
of the Image control and pressed control+v:
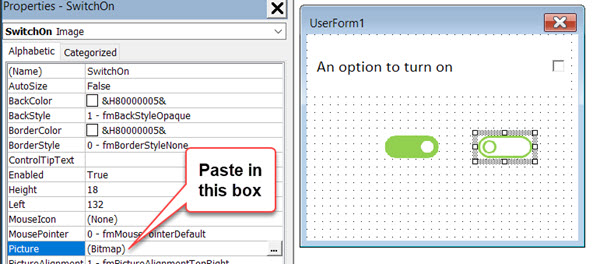
- I changed the name of both Image controls, respectively to SwitchOn
and SwitchOff and placed them on top of each other, right on top of
where the checkbox is:
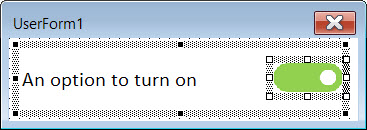
- To make things easier (Thanks Andy Pope, for the suggestion in the comments), set the Enabled property of both switches to False. That way, you appear to click the image, but the click will "go" to the checkbox control underneath, which is what we want.
- Finally, we need some VBA code to make it look like we're moving the switch when we click on the images and when we click on the text of the check box (I did not change the name of the check box, so that is CheckBox1).
We do not need the Image control events, as everything is handled from the click on the checkbox. Here is the VBA code we need to make this work:
' ******Events******
Private Sub CheckBox1_Click()
SetSwitchInCorrectPosition
End Sub
Private Sub UserForm_Initialize()
SetSwitchInCorrectPosition
End Sub
' ******Private routines******
Private Sub SetSwitchInCorrectPosition()
If CheckBox1.Value Then
SwitchOn.Visible = True
SwitchOff.Visible = False
Else
SwitchOn.Visible = False
SwitchOff.Visible = True
End If
End Sub
Of course things become more complicated if you have multiple checkboxes on the form that you want to work this way. I've implemented that in the multiple checkboxes example (in the download) using two class modules.
Nicer buttons
The standard CommandButtons are a boring grey as well. I've created a design where the default color is a pale green, which changes to a slightly darker green when the mouse is over the button:
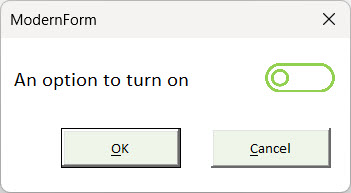
And this is what it looks like when the mouse is over a button:
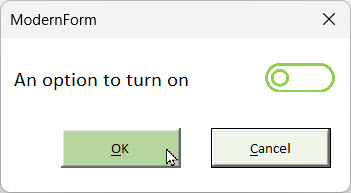
To make this as generic as possible, I've added another class module to the VBA project and some code to each form.
Here is all code that is in the class called clsButtonHighlighter. All it contains is a mouse-move event that changes the color of the CommandButton tied to it and changes all other CommandButtons to their background color:
Public WithEvents btn As CommandButton
Public BackColorHover As Long
Public BackColorNoHover As Long
Public form As Object
Private Sub btn_MouseMove(ByVal Button As Integer, ByVal Shift As Integer, ByVal X As Single, ByVal Y As Single)
Dim ctl As Control
'Color the button that has the mouse over it
btn.BackColor = BackColorHover
'Now make sure all other buttons on the form are set to their background color
For Each ctl In form.Controls
If LCase(TypeName(ctl)) = "commandbutton" Then
If ctl.Name <> btn.Name Then
ctl.BackColor = BackColorNoHover
End If
End If
Next
End Sub
Inside the module behind a userform, these items need adding:
Declaration section
Dim mcButtonHighlighter As New Collection
Const MCBTNCOLORNOHOVER As Long = 15332846 'light green
Const MCBTNCOLORHOVER As Long = 10474935 'slightly darker green
'*** for button highlighting ***
The collection will hold instances of the clsButtonHighlighter class, one for each CommandButton of the form. The constants determine the button colors.
The initialize event of the form
In the userform_initialize event, we add each button to an instance of the clsButtonHighlighter class:
Set checker = New clsChecks
Set checker.SwitchOffControl = Me.SwitchOff
Set checker.SwitchOnControl = Me.SwitchOn
checker.RelativeSize = 0.8
Set checker.TheForm = Me
'*** for button highlighting ***
Dim cBtn As clsButtonHighlighter
Dim ctl As MSForms.Control
For Each ctl In Me.Controls
If LCase(TypeName(ctl)) = "commandbutton" Then
Set cBtn = New clsButtonHighlighter
With cBtn
ctl.BackColor = MCBTNCOLORNOHOVER
.BackColorNoHover = MCBTNCOLORNOHOVER
.BackColorHover = MCBTNCOLORHOVER
Set .form = Me
Set .btn = ctl
End With
mcButtonHighlighter.Add cBtn
End If
Next
'*** for button highlighting ***
End Sub
Note that this event also contains code to handle the switches (check boxes) on the form.
Change buttons back to normal when mouse is not over them
To make sure the buttons change back to their none-hover color once the mouse is no longer over them, the form needs a mousemove event. Otherwise a button stays highlighted until we hover the mouse over another button. We need code like this:
'*** for button highlighting ***
Dim ctl As MSForms.Control
For Each ctl In Me.Controls
If TypeName(ctl) = "CommandButton" Then
ctl.BackColor = MCBTNCOLORNOHOVER
End If
Next
'*** for button highlighting ***
End Sub
Tidy up when form is closed
When the form closes, it is a good idea to terminate all instances of the clsButtonHighlighter class. This is simply done by setting the collection to nothing:
Set checker = Nothing
'*** for button highlighting ***
Set mcButtonHighlighter = Nothing
'*** for button highlighting ***
End Sub
Note we alse terminate the checkbox classes here.
More to follow
I've only discussed how you might create a nice-looking alternative for the check-box and for CommandButtons. I plan to add more controls in the near future. If you've designed modern-looking alternatives yourself, why not add your examples in the comments below?

Comments